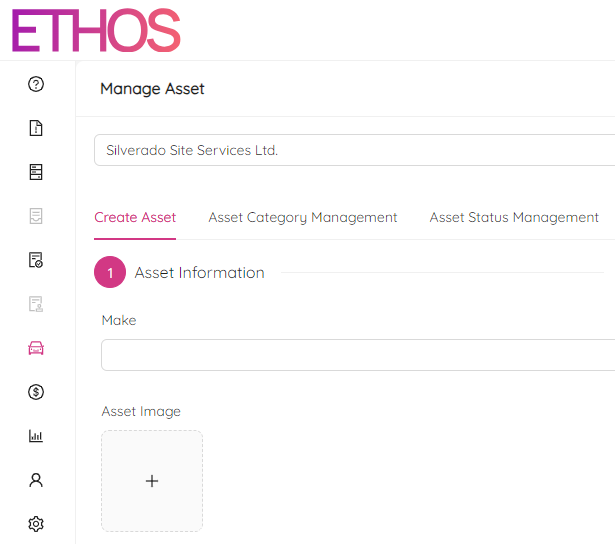
Create Asset
You can create a new asset in ETHOS by going to Manage Asset menu under Assets module.

Select a workspace and click on the Create Asset tab.
Generally, asset creation is divided into four steps:
- Asset Information
- Dynamic Asset Details
- Assign Maintenance
- Complete Maintenance
1. Asset Information
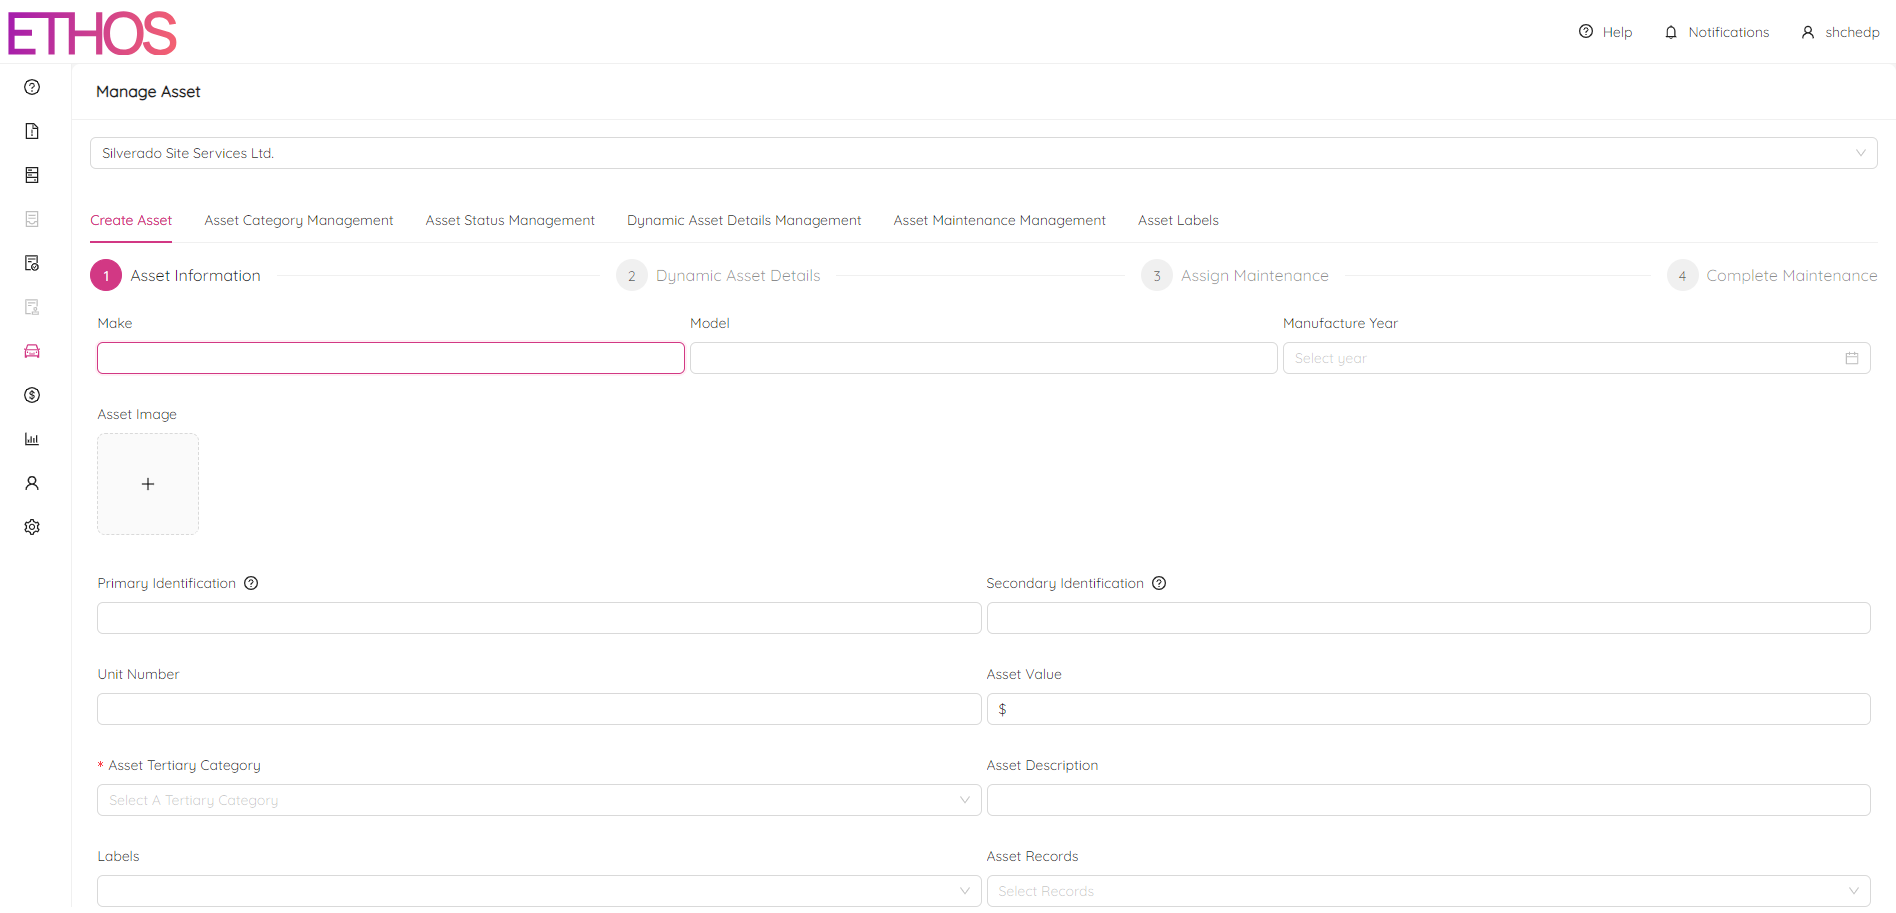
Asset information step includes specifying basic asset attributes such as Make, Model, Manufacture Year and many others. It is a good idea to fill as much data as possible. Feel free to add any notes into the Notes section.
Once the asset information is filled out, click on the Next button at the bottom of the page and confirm by clicking Yes.

NOTE: Keep in mind that at this step an asset will be created in the system and if you click "Go Back" button on your browser and confirm the first step one more time it will create a duplicate.
2. Dynamic Asset Details
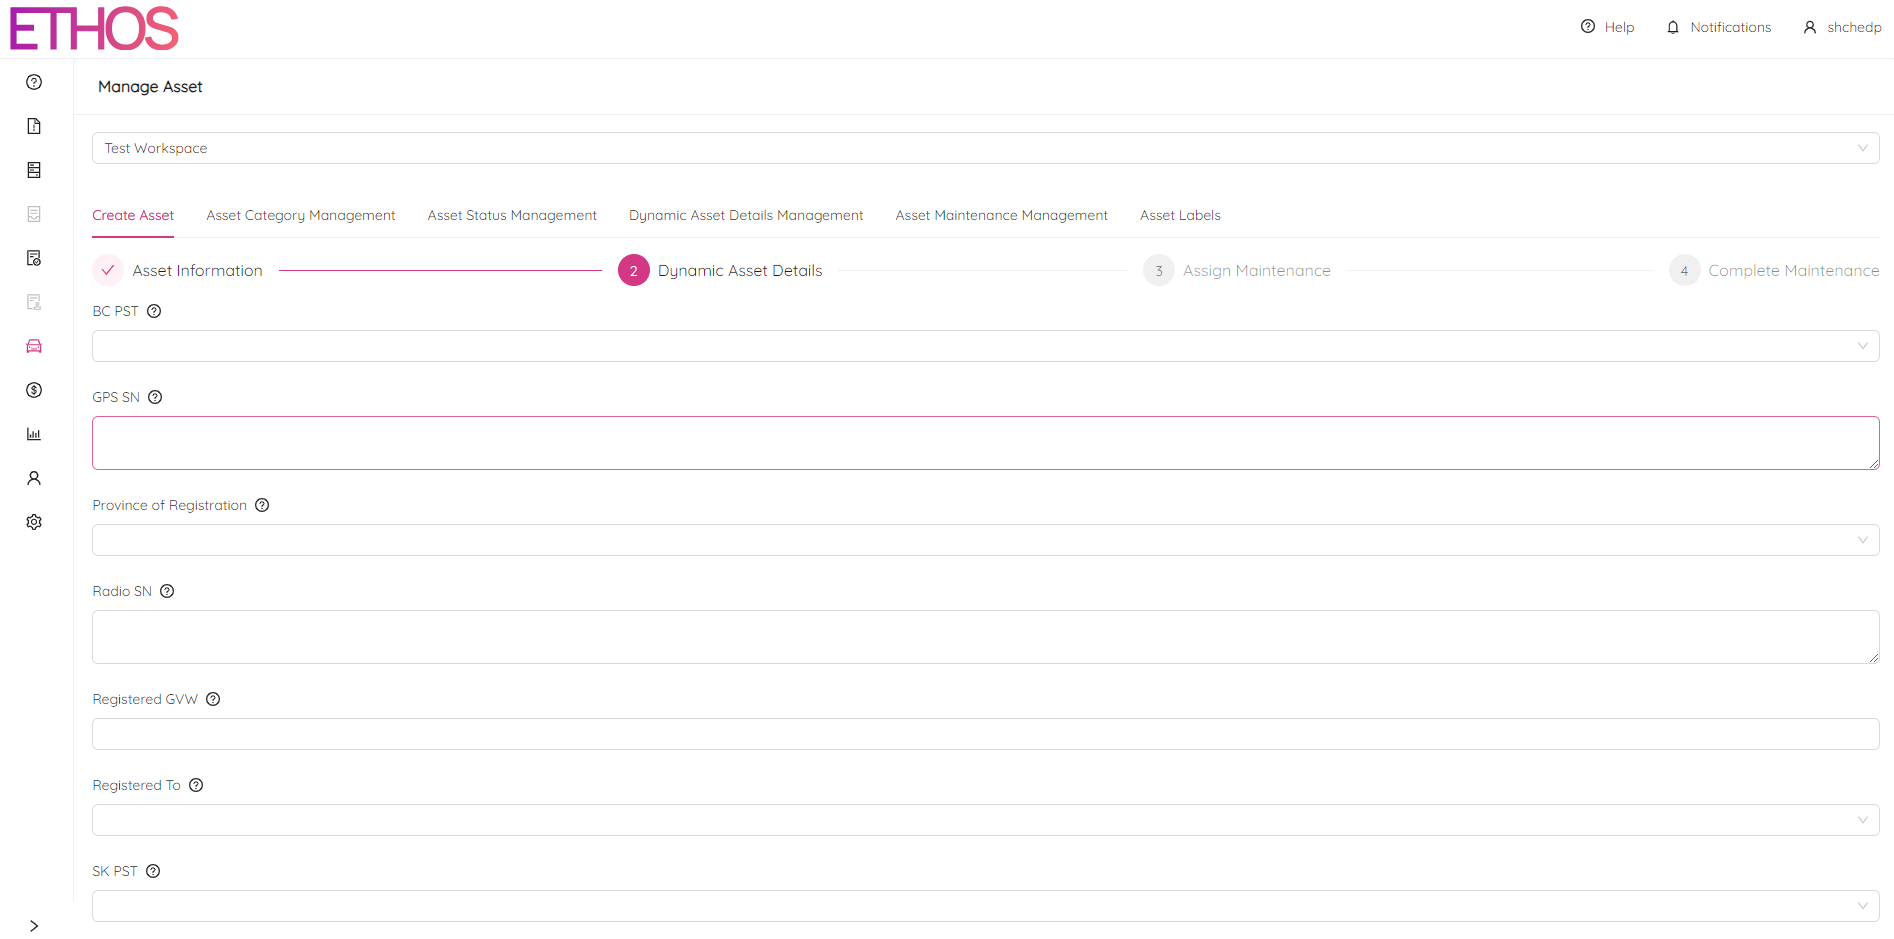
Dynamic Asset Details step covers extented asset attributes under specific category like Registered GVW or BC PST. Similarly, it is better to specify as much details as possible.
NOTE: You can define a dynamic asset details for a particular asset category on the Dynamic Asset Details Management tab (please, refer to Manage Dynamic Asset Details for more information).
After filling in dynamic details, click on the Next button at the bottom of the page and confirm by clicking Yes.
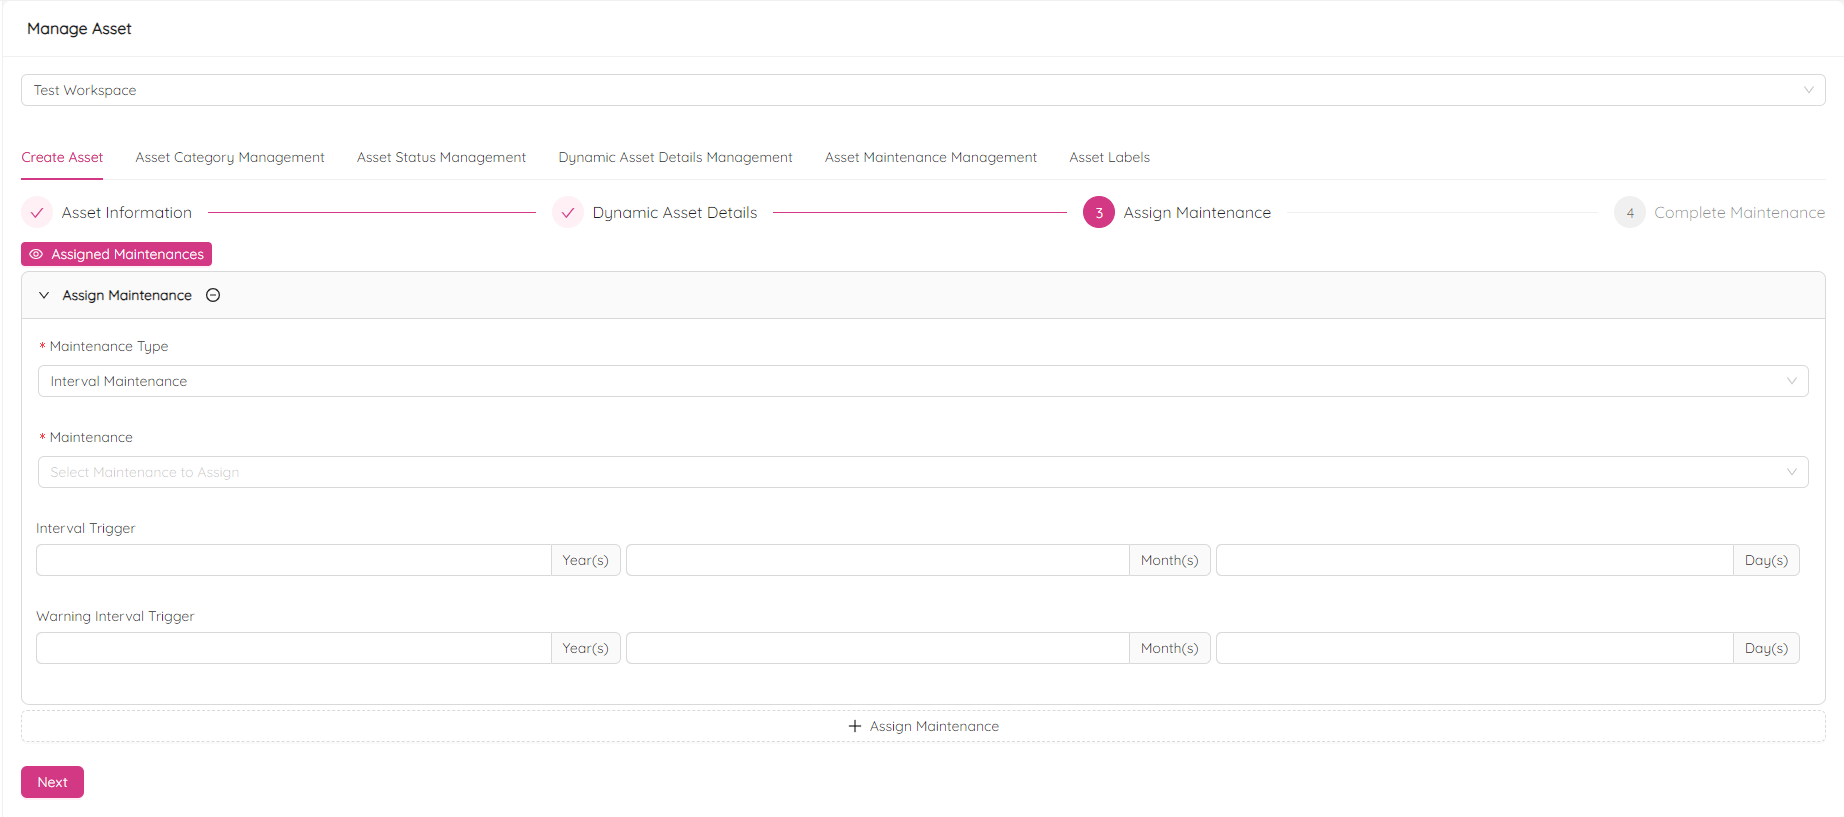
3. Assign Maintenance

The Assign Maintenance step allows you to assign maintenance in the asset creation stage. It is particularly useful when you want to assign maintenance besides periodic maintenance defined by the asset category. Click on the + Add Maintenance button in the middle of the page to add a new record. You will see a new maintenance section popped up. Click on the new section to expand it and fill in the maintenance details.
By clicking on the ![]() icon in the new maintenance section header you can cancel maintenance record creation.
icon in the new maintenance section header you can cancel maintenance record creation.
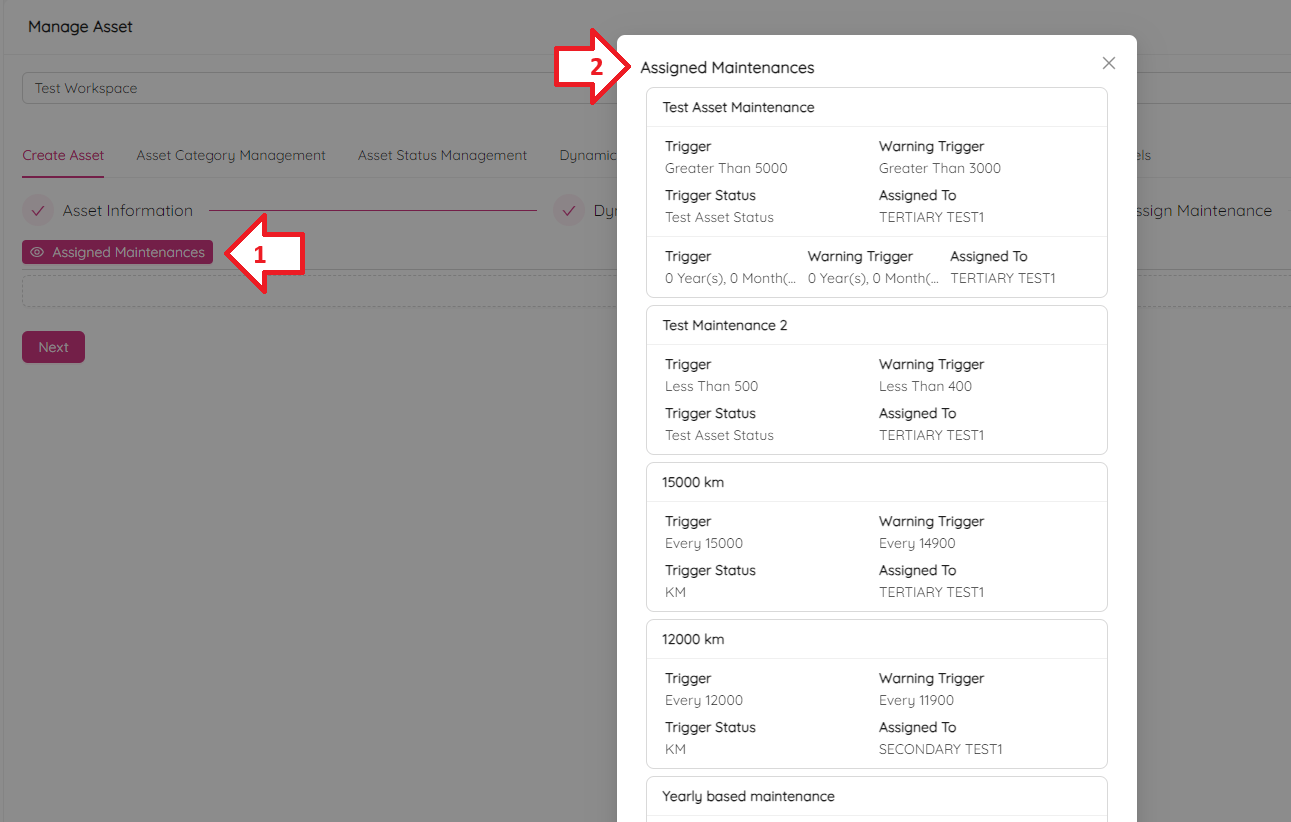
To see already assigned maintenances click Assigned Maintenances button.
After filling in maintenance assignment(s), click on the Next button at the bottom of the page and confirm by clicking Yes.
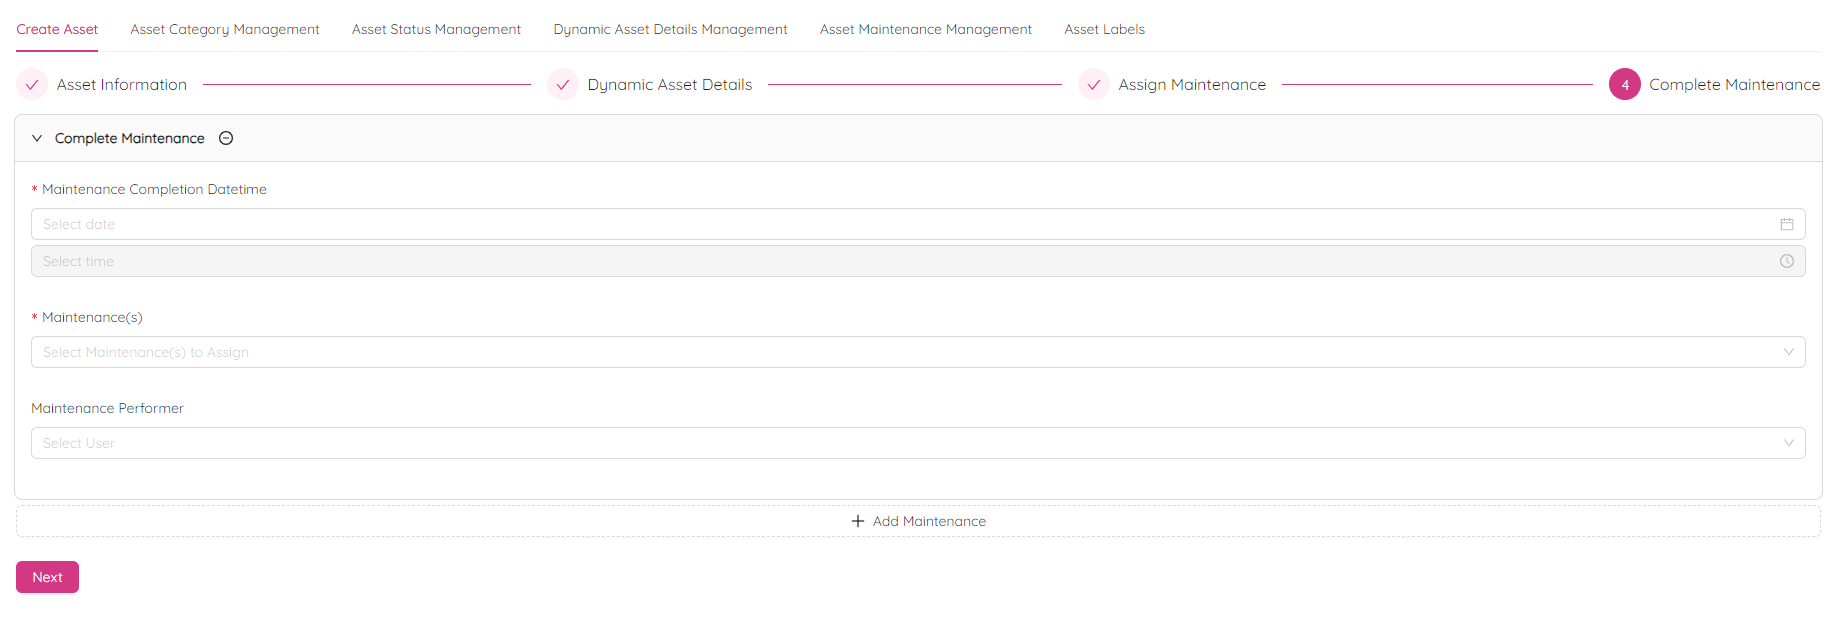
4. Complete Maintenance

Complete Maintenance step allows you to enter previously completed maintenance right during asset creation. Click on the + Add Maintenance button in the middle of the page to add a new record. You will see a new maintenance section popped up. Click on the new section to expand it and fill in the maintenance details.
By clicking on the ![]() icon in the new maintenance section header you can cancel maintenance record creation.
icon in the new maintenance section header you can cancel maintenance record creation.
After filling in the maintenance details, click on the Next button at the bottom of the page and confirm by clicking Yes to finalize the asset creation.
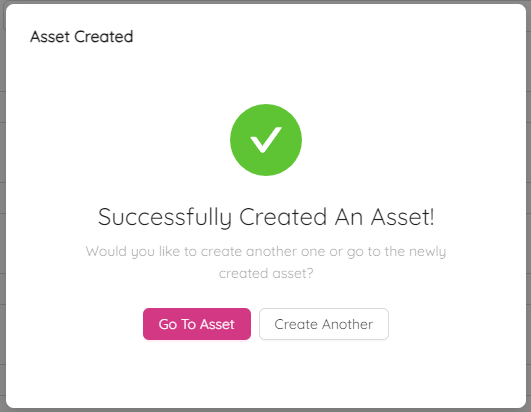
As a result, you will see a success box similar to the following. Use the Go To Asset button to bounce quickly to the newly created asset or Create Another to create one more.