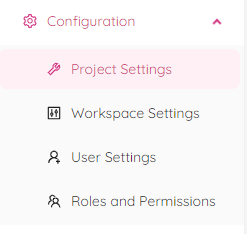
Project Settings
By selecting “Project Settings” from the popup panel you will be redirected to the "Project Settings" page.
Choose a project from the "Select Project" list to view and edit settings of the specific project.
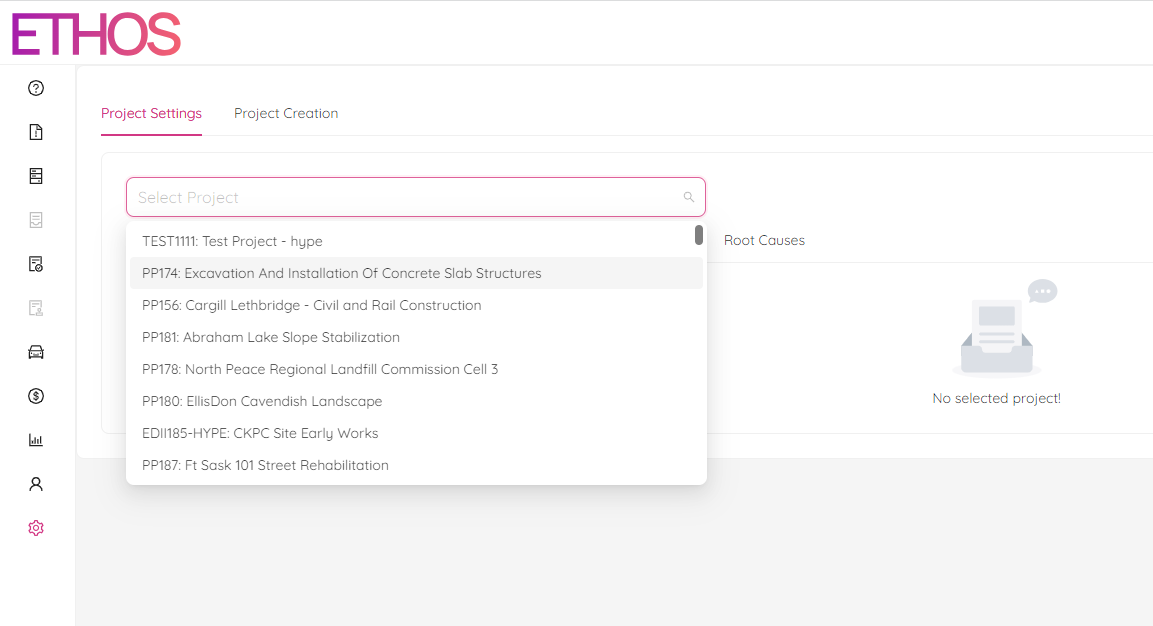
You can search among projects by typing in your request in the same field.
After selecting a project, you will see all information about the project divided into the following categories: Project Information, Project Roles, Distribution List, Coordinators, Aliases and Root Causes.
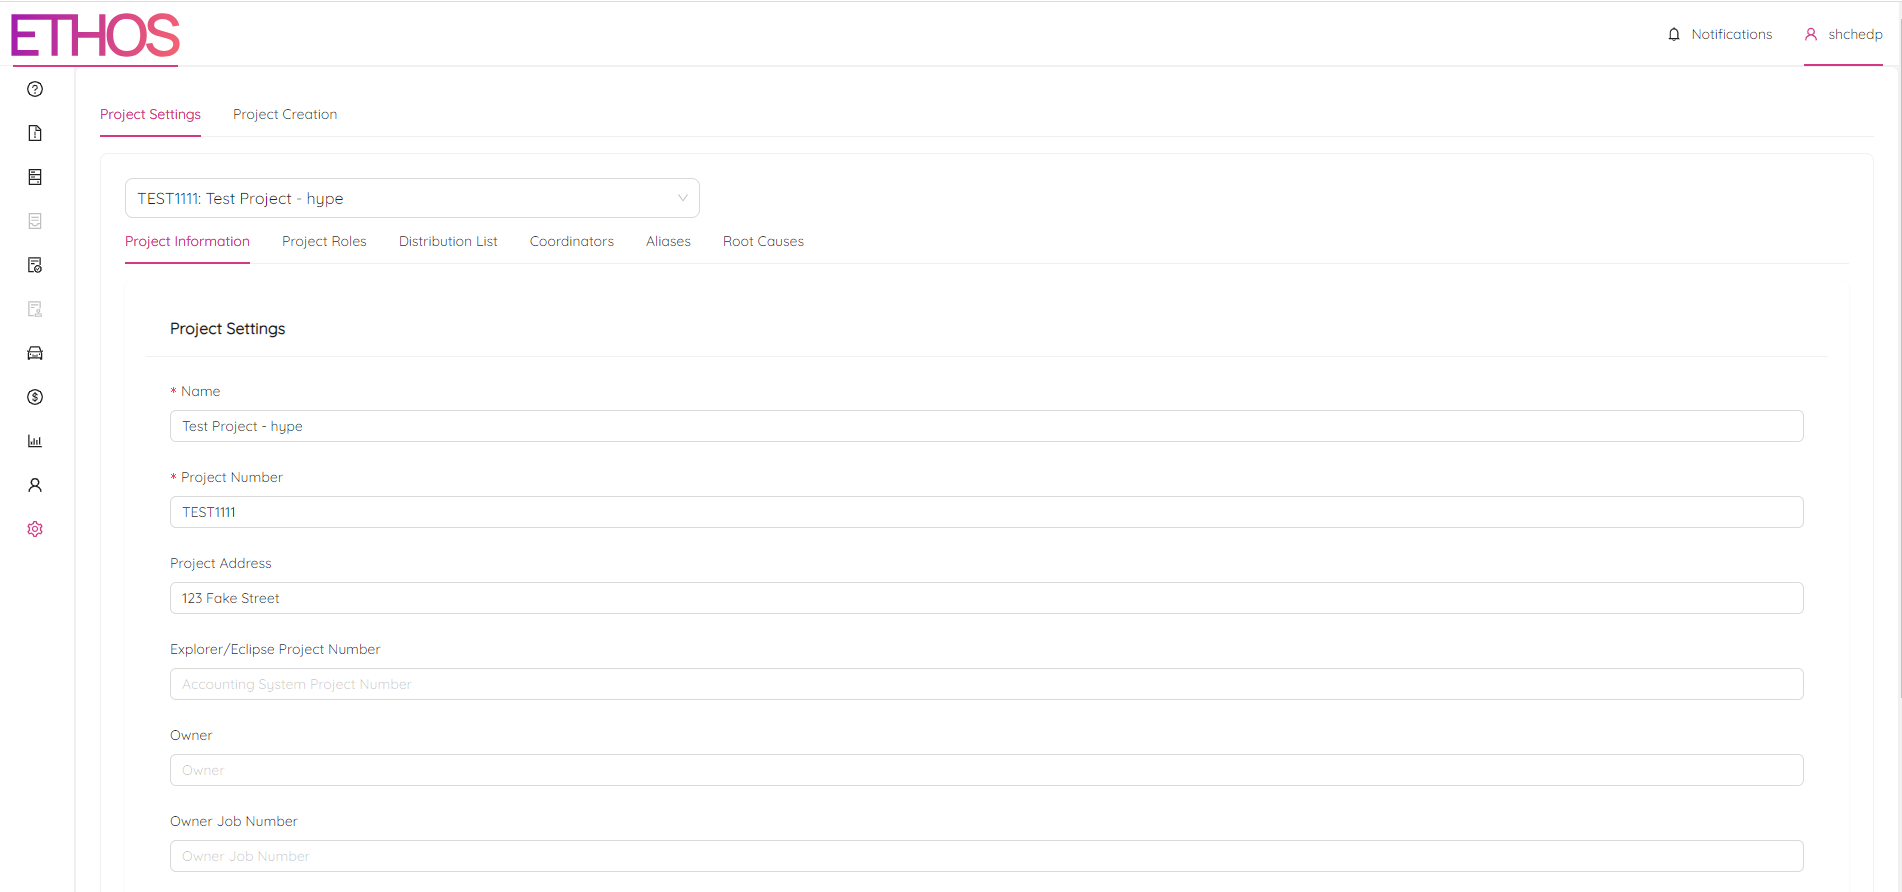
Project Information
On the Project Information page, you will see the main project attributes like Project Name, Number, Address as well as the workspace it belongs to. Don't forget to save your changes by clicking the "Save" button at the bottom of the page.
Project Roles
On the Project Roles page, you can add, remove and change the permissions of each user in a project by assigning roles to them. This is also the place where you can specify what organization a user belongs to in the project.
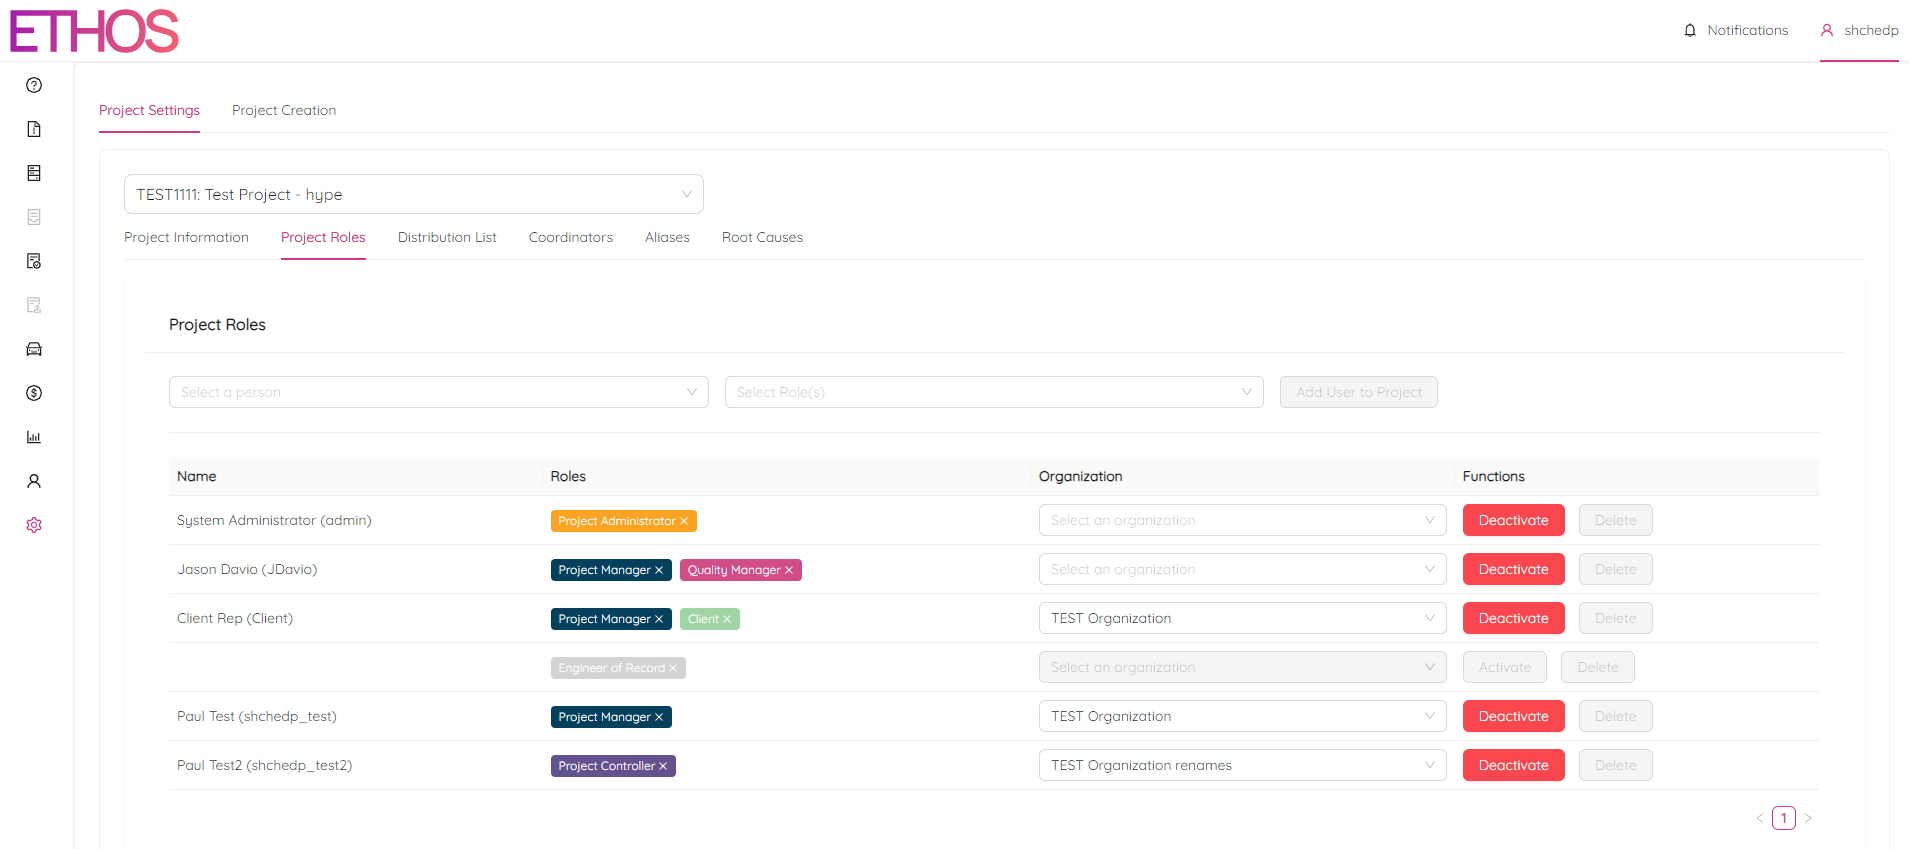
In order to add a user to the project:
- Select a user from "Select a person" list.
- Assign one or several roles from "Select Role(s)" list.
- Click on the "Add User to Project" button.
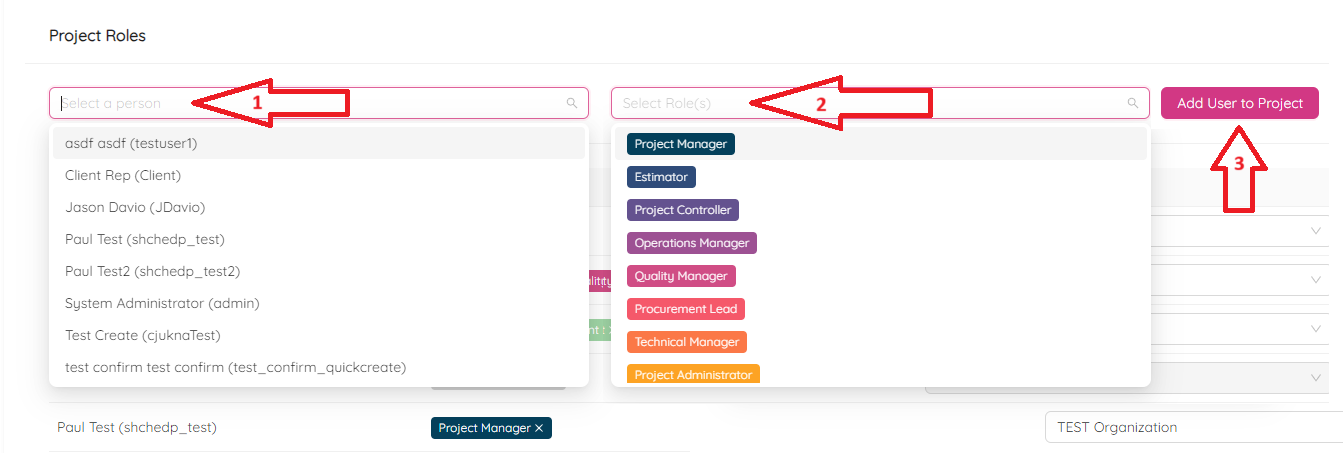
After the user is added, you can specify the organization it belongs to by picking one from the "Select an organization" list.
You can remove any role assigned to a user by clicking on the (X) button of the specific role.

By clicking on the functions buttons, you can deactivate or delete a user from the project.
Distribution List
By navigating to the Distribution List tab in Project Settings you can add and remove users to the distribution list for the selected project.
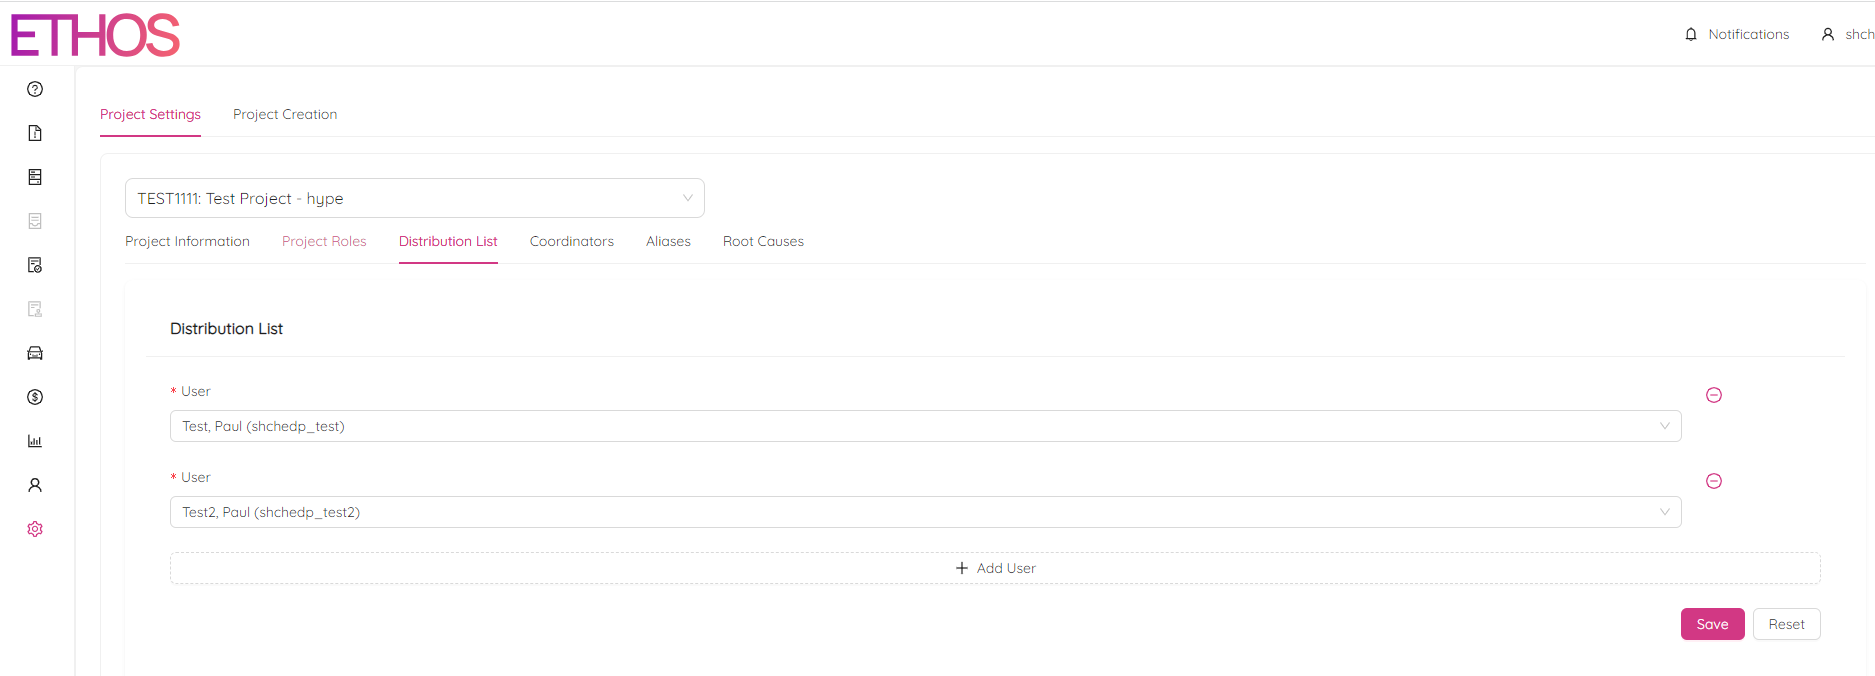
A user who is added to the distribution list for a project will be notified by email any time a change is made in that project. This is a great way to ensure all selected users are kept updated and informed about the projects they are working on.
To add a user simply click on the "+ Add User" button and select a user from the list. You can alway remove any user by licking on (-). Don't forget to save changes by clicking on the "Save" button or discard them by clicking on the "Reset" button.
Coordinators
On the Coordinators tab in you can add and remove users from the coordinators list for the particular project.
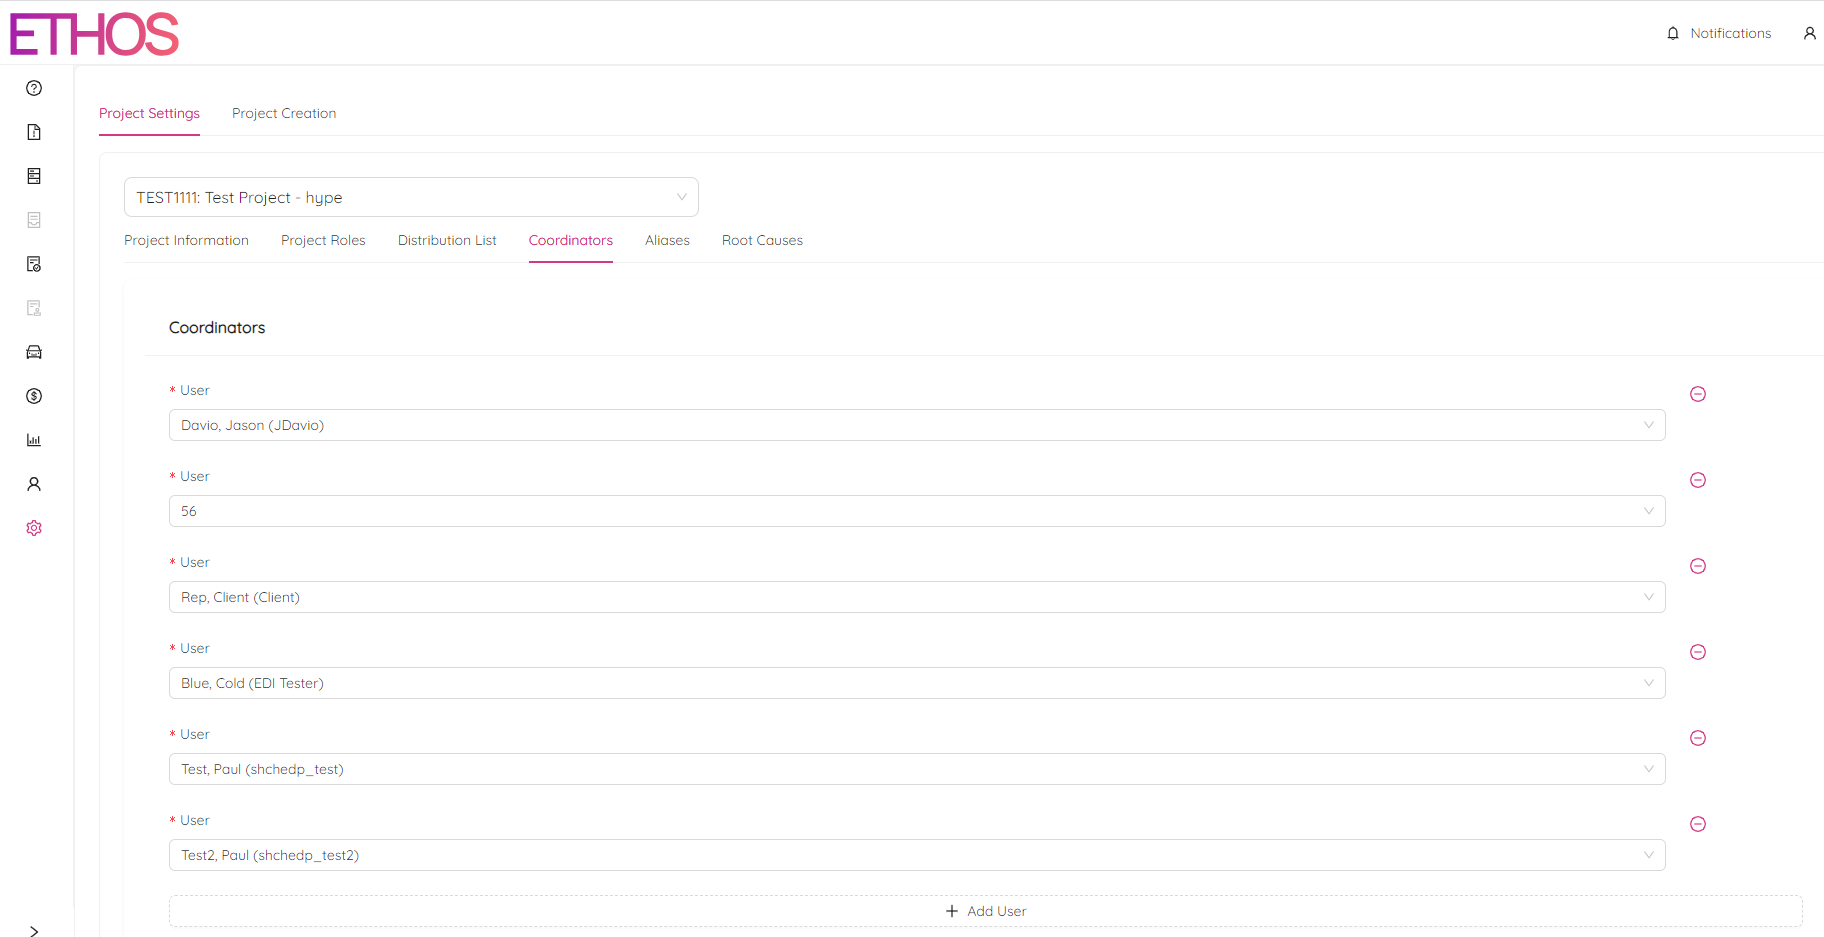
To add a user simply click on the "+ Add User" button and select a user from the list. You can alway remove any user by licking on (-). Don't forget to save changes by clicking on the "Save" button or discard them by clicking on the "Reset" button.
Aliases
Aliases are a way to ensure the correct parties are held accountable for their actions even if they are not using ETHOS. When working with parties outside of ETHOS, it is a good practice to add that party as an alias to the project. To add and manage aliases, use the “Aliases” tab in the “Project Settings” module.
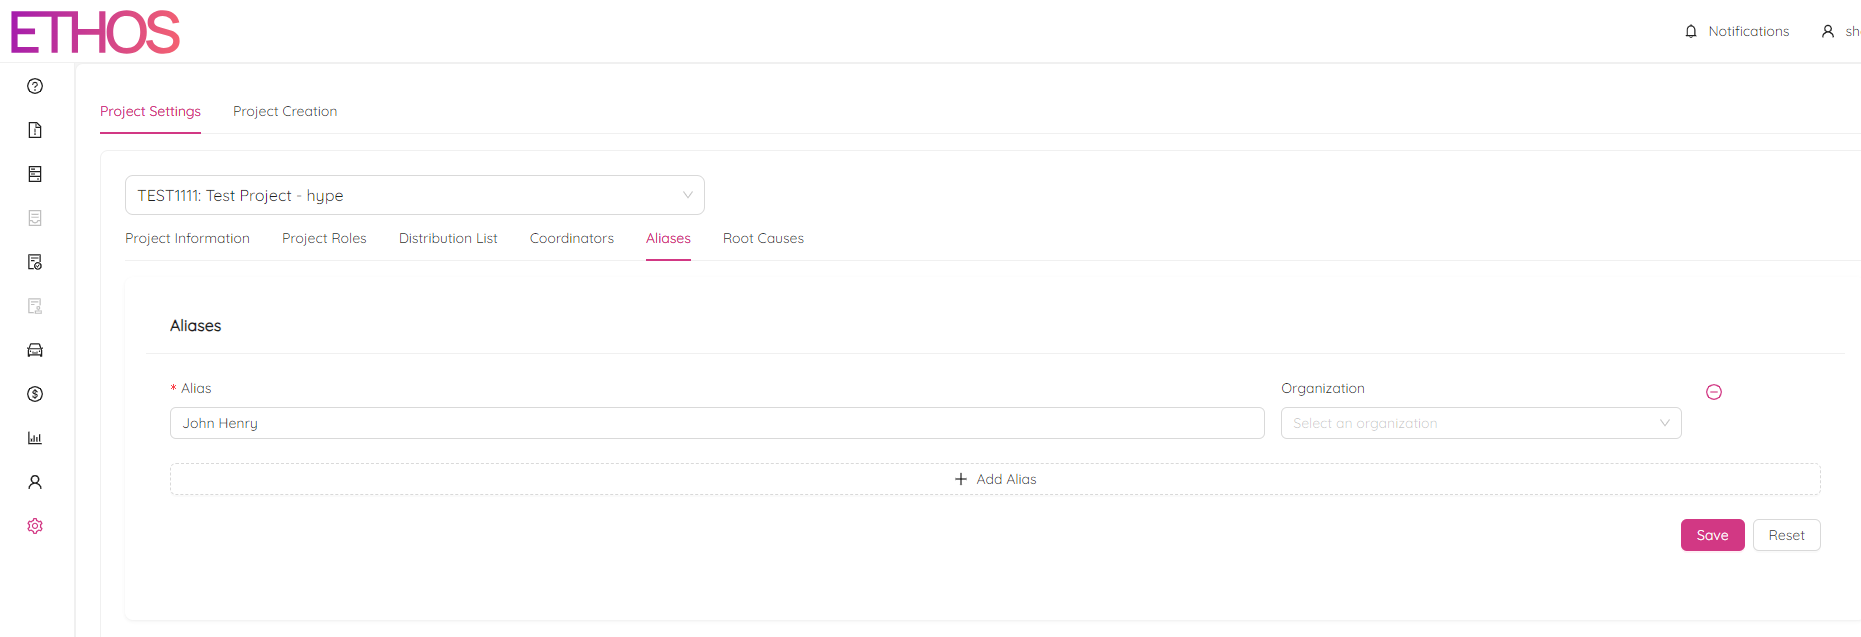
To add a user simply click on the "+ Add User" button, select a user from the list and choose an organization they represent. You can alway remove any user by licking on (-). Don't forget to save changes by clicking on the "Save" button or discard them by clicking on the "Reset" button.
Once an Alias has been added to a project, any actions in the PTR process that would be completed by the outside party can be logged in ETHOS by another user under the alias of the outside party. The name of the user who is submitting an action under an alias will also be displayed to avoid any cases of mistaken identity.
Root Causes
Root Causes and Sub Root Causes are a great way to identify trends in the NCRs for a project. Each project has following six predefined root cause options:
- Machines
- Methods
- Materials
- Environmental
- People
- Measurements
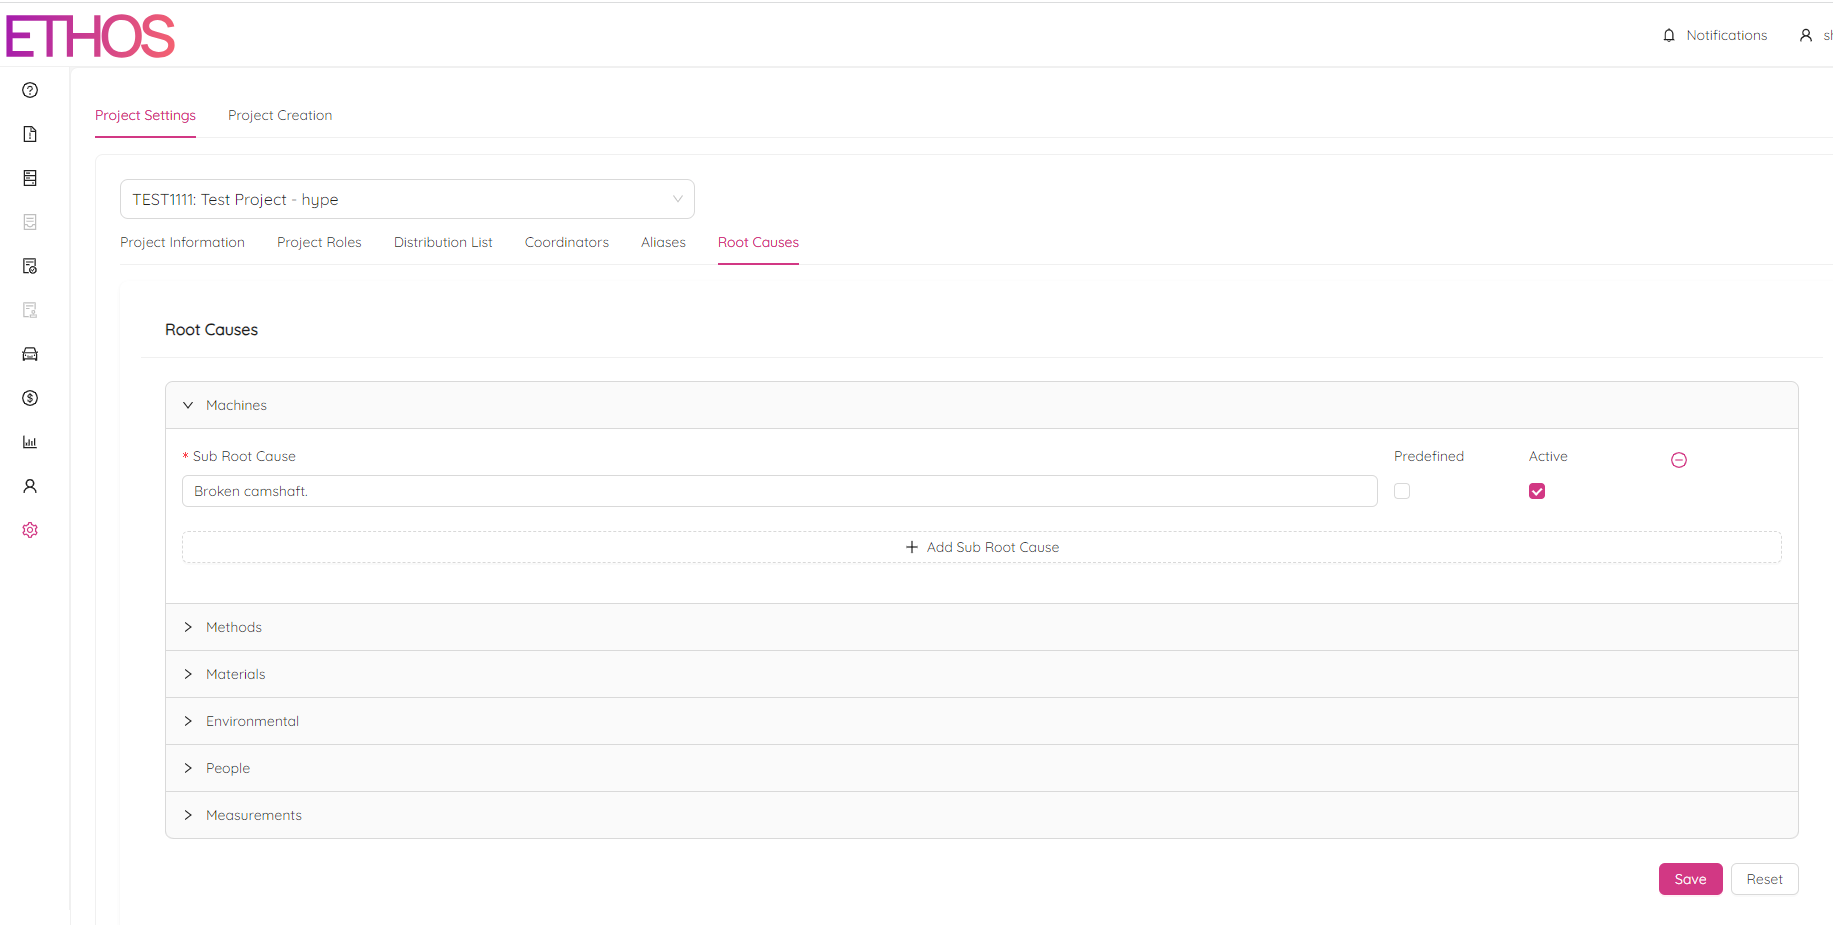
Each root cause has user-defined sub root causes that give another level of detail to explain why an NCR occurred.
An example of this would be:
Root Cause - People,
Sub-Root Cause - Failure to communicate.
To manage Root Causes, navigate to the "Root Causes" tab in "Project Settings" module.
To add a sub root cause simply:
- Click on the "+ Add Sub Root Cause" button under the particular root cause,
- Describe the cause in the "Sub Root Cause" field,
- Pick if it is predefined and active,
- Click "Save" to save changes or discard them by clicking on the "Reset" button.
If predefined is selected, users will only be able to choose from a list of the predefined sub-root causes. If no sub root cause is selected as predefined, then all sub root causes labelled active will be selectable by users, and users will also be allowed to enter their text as a sub root cause when selecting one for an NCR.
You can alway remove any sub root cause by clicking on (-).