Retrospect View Logs
Overview
Retrospect View Logs module allows to view a list of all lessons learned and see their attributes such as Subject, Impact and many others.
To access the module, simply click on the View Logs option located on the navigation panel on the left-hand side of the page.
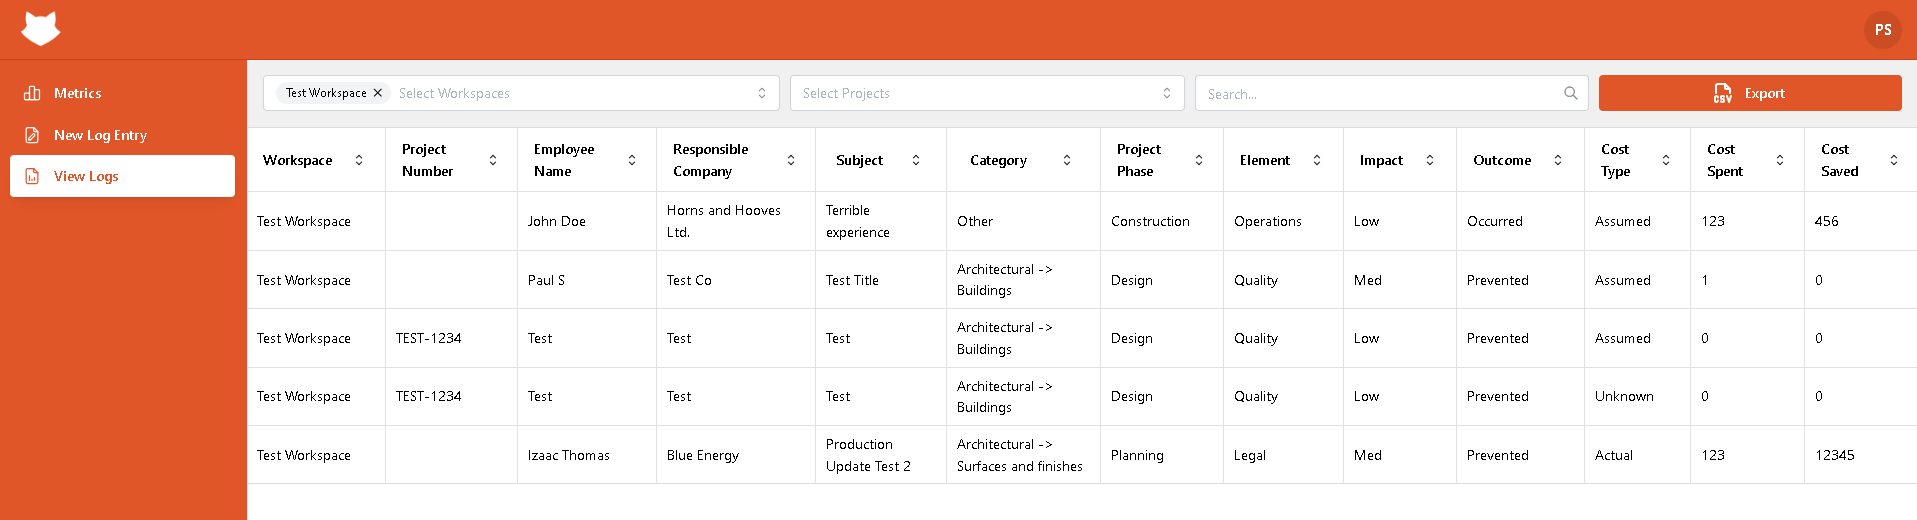
Above the grid, you will see the Select Workspace and Select Projects dropdown lists that you can use to filter records by workspace and project they belong to. You can pick one or several workspaces and projects. Next to them, you will see a Search panel that you can use to make a quick search.
By clicking on the Export button at the top right corner, you can export data to a CSV file.

You can sort by any column in ascending order by clicking on its header. If you click on the header again, it will change the order to descending.
Clicking on any lesson record will lead you to a Lesson Learned detail view page.
Lesson Learned Detail View
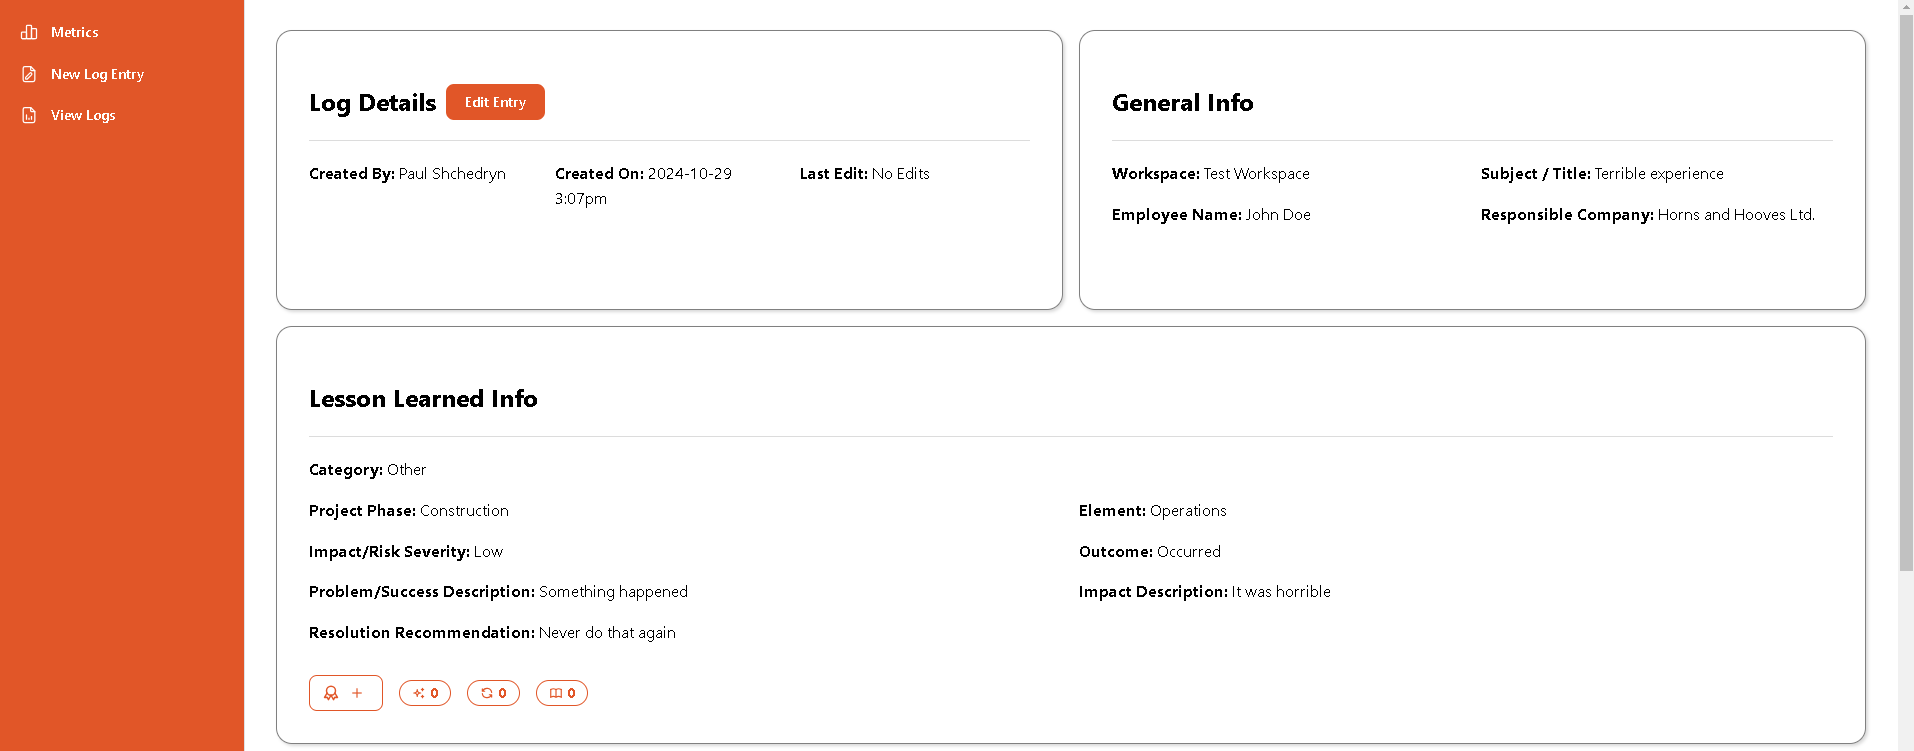
If you click on a record, you will get into a Log Details view that shows all lesson learned information on one page.
The information is divided into several sections. At the top left, you can see the name of the record creator and the time when it was created and last time edited.

The General Info section shows overall information such as the workspace name the entry belongs to, title, and employee name.

The Lesson Learned Info section demonstrates details such as project phase when the event occurred, impact security, and brief problem description.
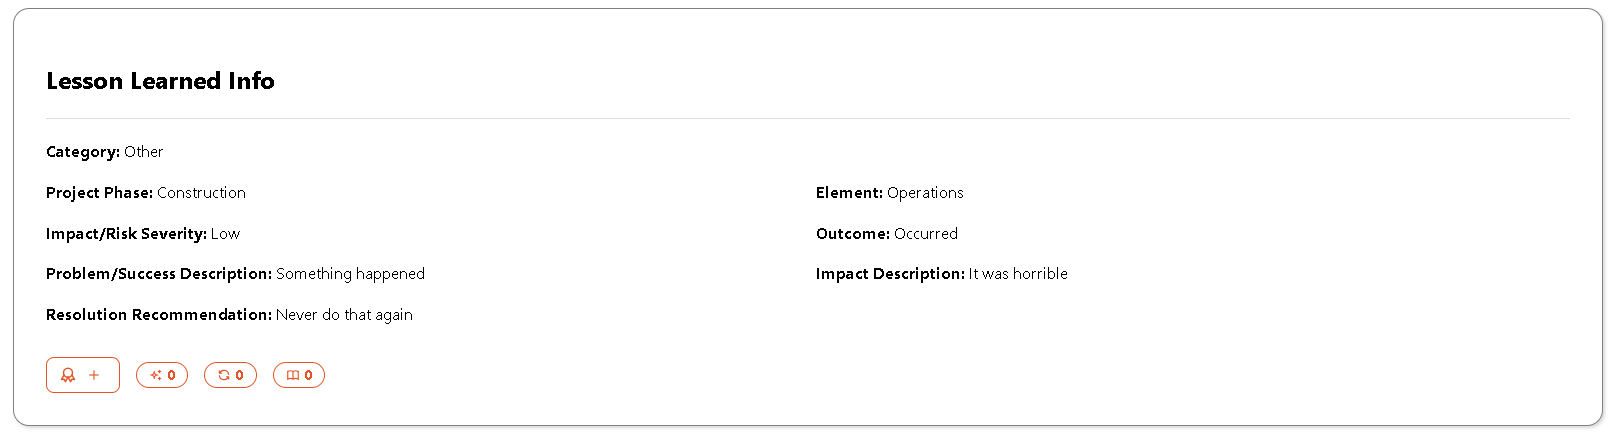
Also, it has three reaction icons that are High Quality, Occurs Often, and I Learned Something. Any Retrospect user can react to a lesson learned record by clicking on the ![]() icon and selecting the appropriate reaction.
icon and selecting the appropriate reaction.

Below you can find the Financial Info section that shows spent and saved costs.

At the bottom of the page, you will see documents attached to the lesson learned record if there are any.
Edit Entry
To edit the record, click on the Edit Entry button at the top of the page. You will see an Edit Log Entry box with a list of all entry details.
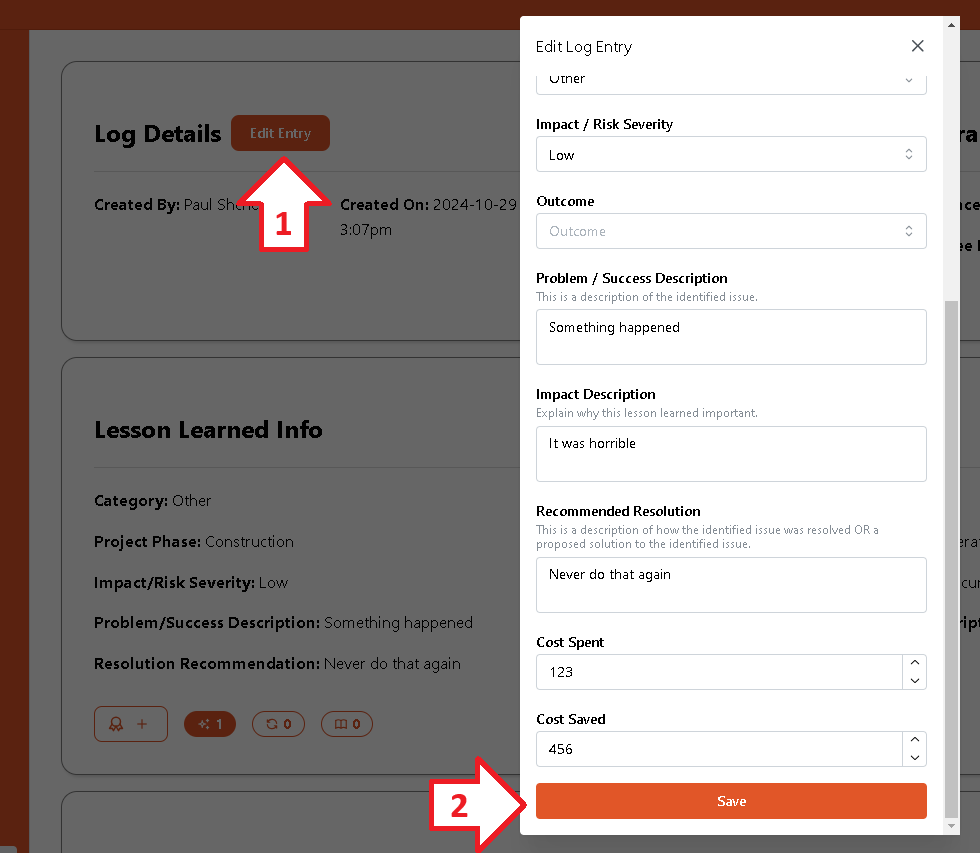
Click the Save button at the bottom of the box to confirm changes. Note that you can only edit records created by you.