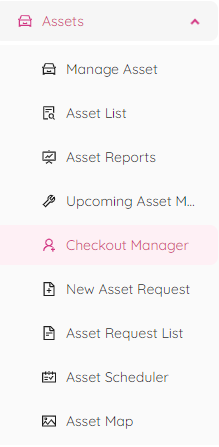
Checkout Manager
The "Checkout Manager" page is where you will be able to view an overview of all the Assets that have either been checked out and by whom, or what assets are available to checkout.
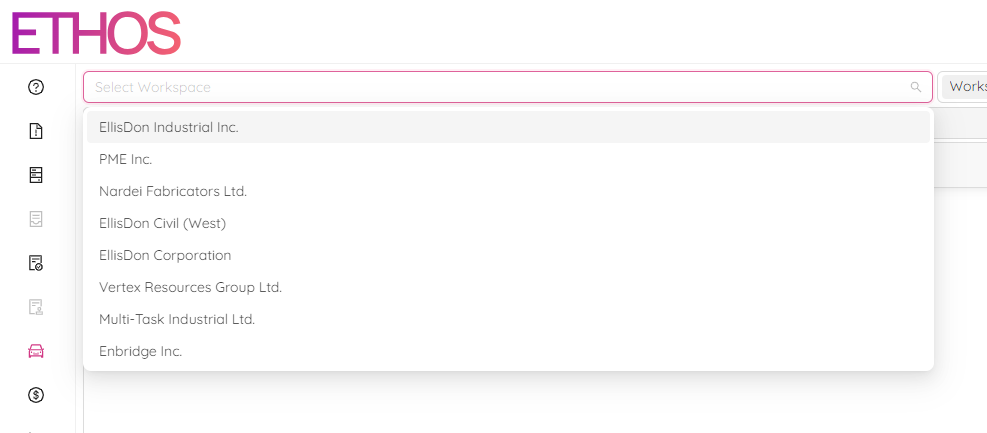
By selecting “Checkout Manager” from the popup window you will be redirected to the Assets Checkout Manager page.
In the "Select Workspace" dropdown menu choose the workspace your account is a part of.
There are two tabs on the page: "Check In Asset" for the assets checked out by users and "Check Out Asset" for the assets available to check out.
Check In Asset
Pick a Primary, Secondary and Tertiary Categories to see the assets. You have to select at least a Primary and Secondary category to get the result. Once you choose your workspace and the categories, you will see the following page that provides a high-level view of all assets that have been checked out in a selected workspace.
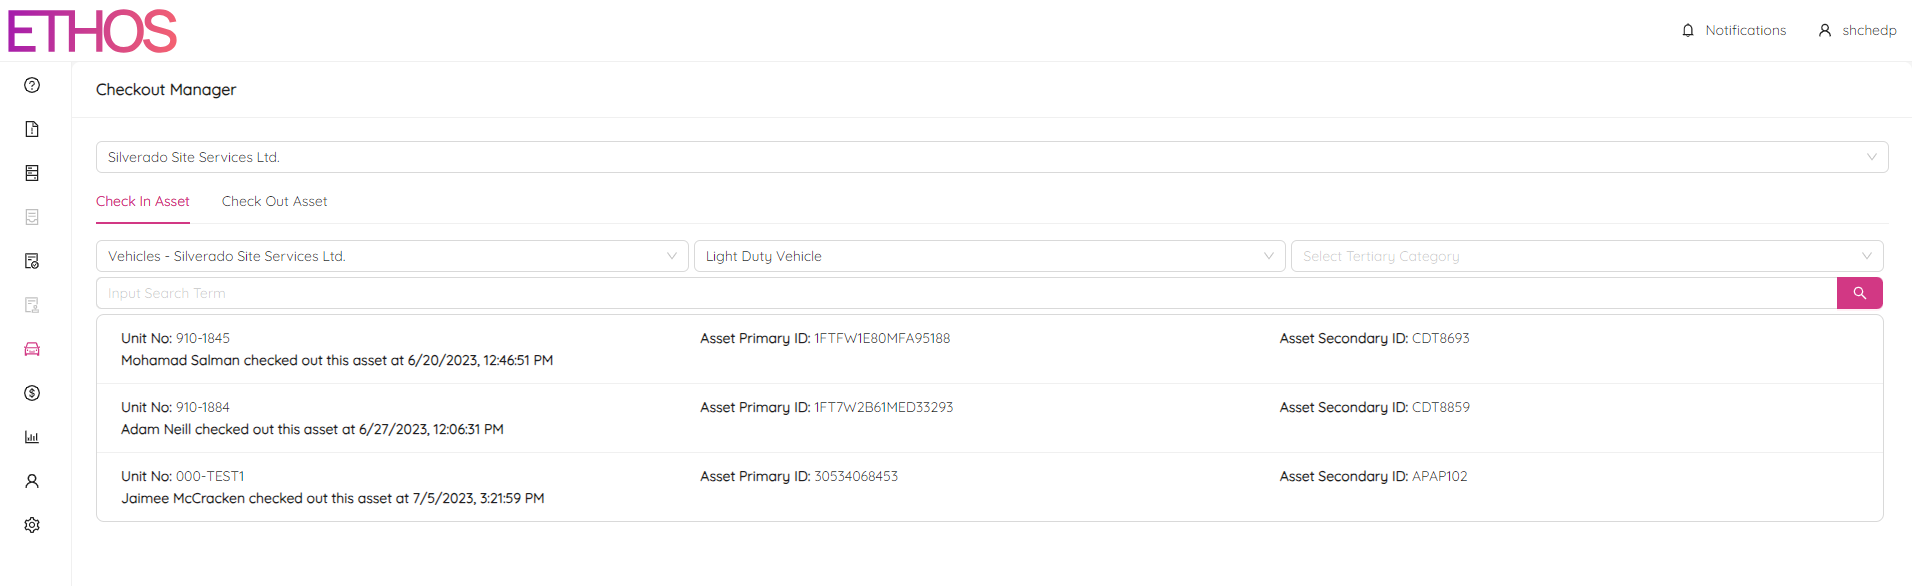
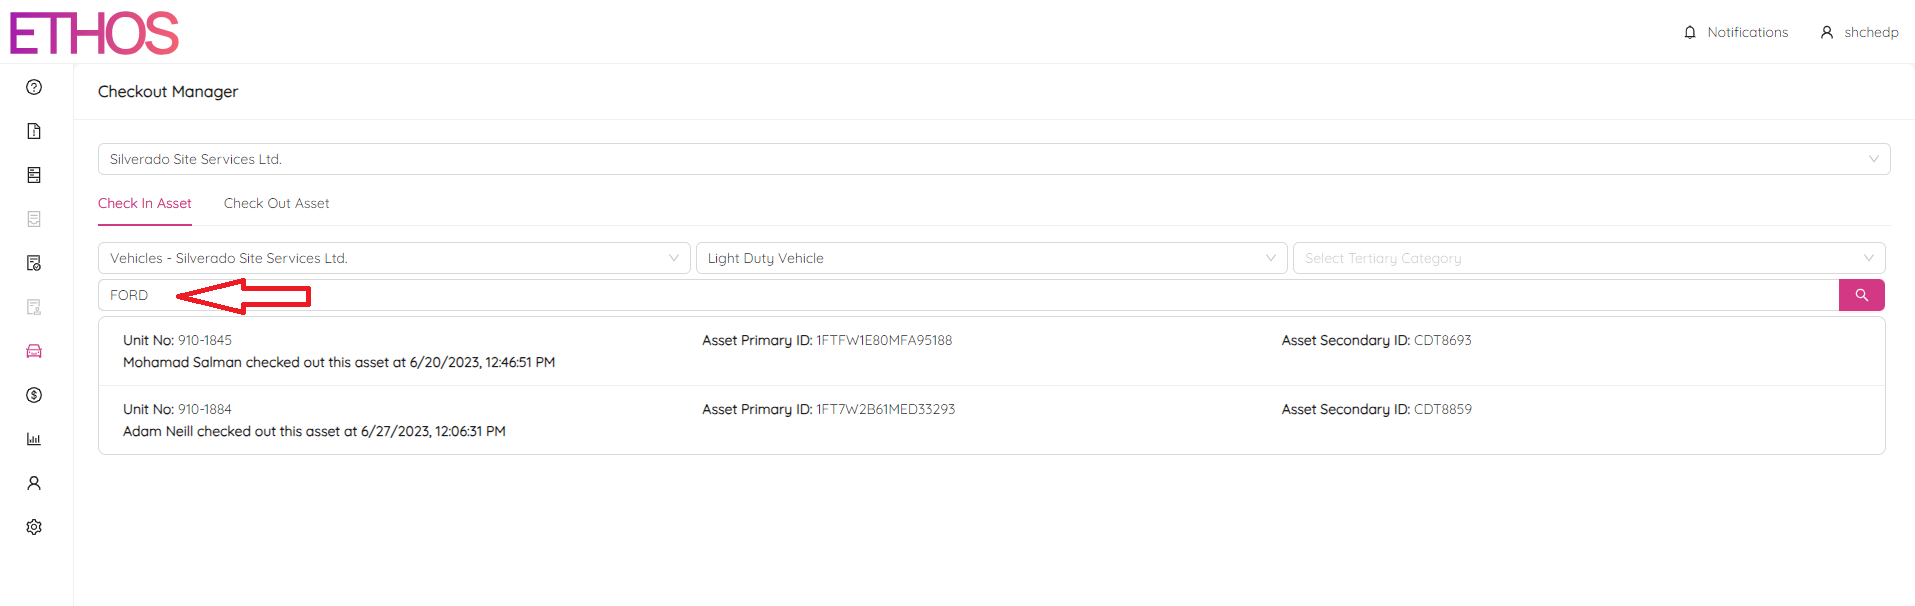
Specific assets can be searched for by using the search bar.
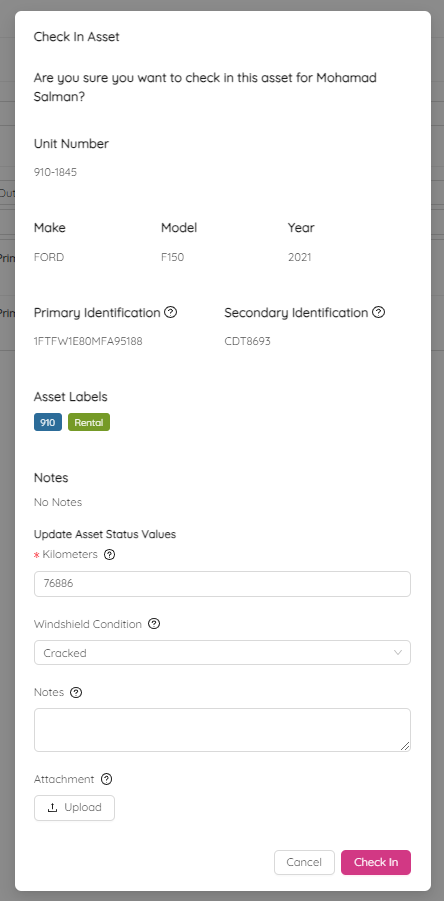
By clicking on the specific asset, you can check it in so it becomes available to check out again. You can update the mileage and windshield condition, leave some notes or attach any document.
Check Out Asset
Similarly you can view the list of available to check out assets. You have to select at least a Primary and Secondary category to get the result.
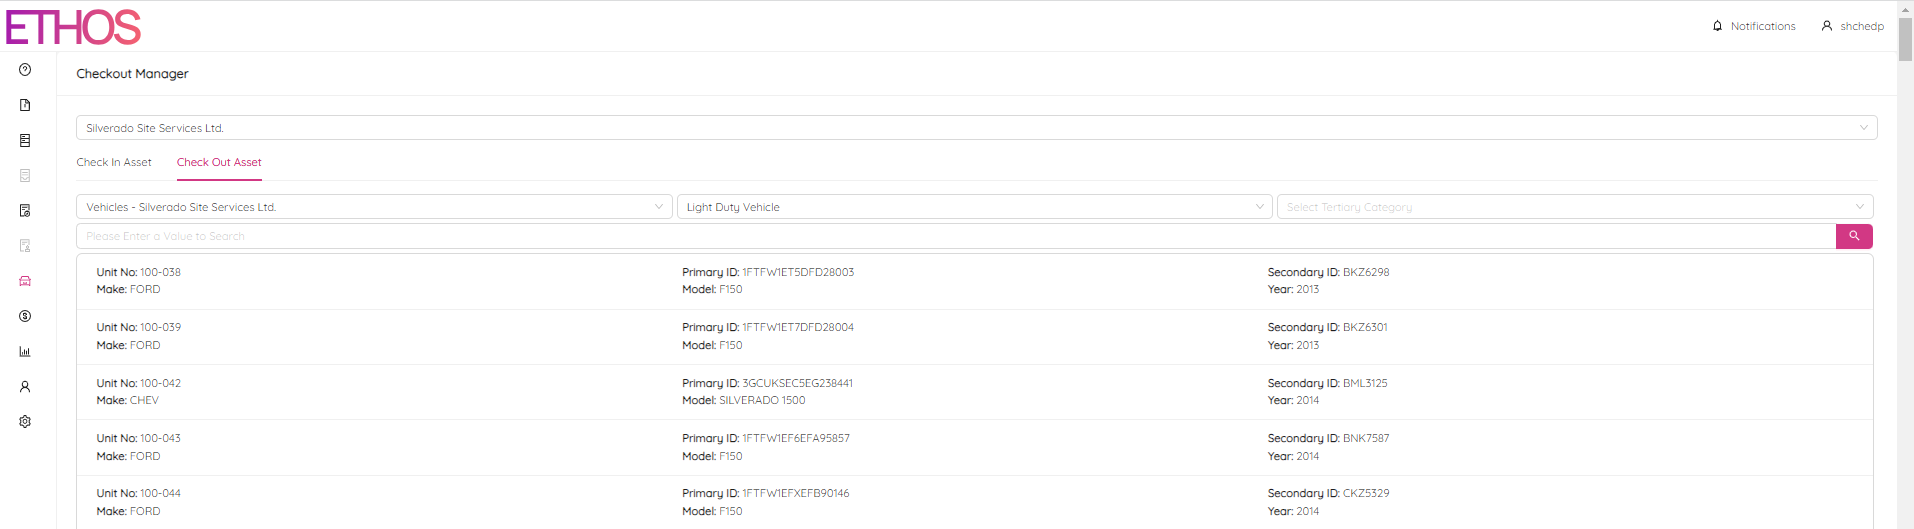
Specific assets can be searched for by using the search bar.

By clicking on the specific asset, you can check it out so it moves to the list of checked-out assets. You have to pick a user you would like to check out the asset for.

You may see the following confirmation request saying that the user doesn't have proper records.
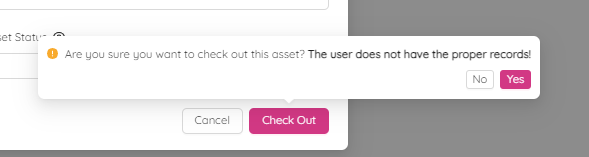
Generally, it is a good idea to choose not to sign this asset out to that person until we have all the proper documentation (i.e. competency records).